Self-hosted Authentication (dbAuth)
Redwood's own dbAuth provides several benefits:
- Use your own database for storing user credentials
- Use your own login, signup and forgot password pages (or use Redwood's pre-built ones)
- Customize login session length
- No external dependencies
- No user data ever leaves your servers
- No additional charges/limits based on number of users
- No third party service outages affecting your site
And potentially one large drawback:
- Use your own database for storing user credentials
However, we're following best practices for storing these credentials:
- Users' passwords are salted and hashed with PBKDF2 before being stored
- Plaintext passwords are never stored anywhere, and only transferred between client and server during the login/signup phase (and hopefully only over HTTPS)
- Our logger scrubs sensitive parameters (like
password) before they are output
Even if you later decide you want to let someone else handle your user data for you, dbAuth is a great option for getting up and running quickly (we even have a generator for creating basic login and signup pages for you).
How It Works
dbAuth relies on good ol' fashioned cookies to determine whether a user is logged in or not. On an attempted login, a serverless function on the api-side checks whether a user exists with the given username (internally, dbAuth refers to this field as username but you can use anything you want, like an email address). If a user with that username is found, does their salted and hashed password match the one in the database?
If so, an HttpOnly, Secure, SameSite cookie (dbAuth calls this the "session cookie") is sent back to the browser containing the ID of the user. The content of the cookie is a simple string, but AES encrypted with a secret key (more on that later).
When the user makes a GraphQL call, we decrypt the cookie and make sure that the user ID contained within still exists in the database. If so, the request is allowed to proceed.
If there are any shenanigans detected (the cookie can't be decrypted properly, or the user ID found in the cookie does not exist in the database) the user is immediately logged out by expiring the session cookie.
Setup
A single CLI command will get you everything you need to get dbAuth working, minus the actual login/signup pages:
yarn rw setup auth dbAuth
You will be prompted to ask if you want to enable WebAuthn support. WebAuthn is an open standard for allowing authentication from devides like TouchID, FaceID, USB fingerprint scanners, ane more. If you think you want to use WebAuthn, enter y at this prompt and read on configuration options.
You can also add WebAuthn to an existing dbAuth install. Read more about WebAuthn usage and config below.
Read the post-install instructions carefully as they contain instructions for adding database fields for the hashed password and salt, as well as how to configure the auth serverless function based on the name of the table that stores your user data. Here they are, but could change in future releases (these do not include the additional WebAuthn required options, make sure you get those from the output of the setup command):
You will need to add a couple of fields to your User table in order to store a hashed password and salt:
model User {
  id             Int @id @default(autoincrement())
  email          String  @unique
  hashedPassword      String    // <─┐
  salt                String    // <─┼─ add these lines
  resetToken          String?   // <─┤
  resetTokenExpiresAt DateTime? // <─┘
}
If you already have existing user records you will need to provide a default value or Prisma complains, so change those to:
hashedPassword String @default("")
salt           String @default("")
You'll need to let Redwood know what field you're using for your users'
idandusernamefields In this case we're usingidandauthFieldsconfig in/api/src/functions/auth.js(this is also the place to tell Redwood if you used a different name for thehashedPasswordorsaltfields):authFields: {
id: 'id',
username: 'email',
hashedPassword: 'hashedPassword',
salt: 'salt',
resetToken: 'resetToken',
resetTokenExpiresAt: 'resetTokenExpiresAt',
},To get the actual user that's logged in, take a look at
getCurrentUser()in/api/src/lib/auth.js. We default it to something simple, but you may use different names for your model or unique ID fields, in which case you need to update those calls (instructions are in the comment above the code).Finally, we created a
SESSION_SECRETenvironment variable for you in.env. This value should NOT be checked into version control and should be unique for each environment you deploy to. If you ever need to log everyone out of your app at once change this secret to a new value. To create a new secret, run:yarn rw g secretNeed simple Login, Signup and Forgot Password pages? Of course we have a generator for those:
yarn rw generate dbAuth
Note that if you change the fields named hashedPassword and salt, and you have some verbose logging in your app, you'll want to scrub those fields from appearing in your logs. See the Redaction docs for info.
Scaffolding Login/Signup/Forgot Password Pages
If you don't want to create your own login, signup and forgot password pages from scratch we've got a generator for that:
yarn rw g dbAuth
Once again you will be asked if you want to create a WebAuthn-enabled version of the LoginPage. If so, enter y and follow the setup instructions.
The default routes will make them available at /login, /signup, /forgot-password, and /reset-password but that's easy enough to change. Again, check the post-install instructions for one change you need to make to those pages: where to redirect the user to once their login/signup is successful.
If you'd rather create your own, you might want to start from the generated pages anyway as they'll contain the other code you need to actually submit the login credentials or signup fields to the server for processing.
Configuration
Almost all config for dbAuth lives in api/src/functions/auth.js in the object you give to the DbAuthHandler initialization. The comments above each key will explain what goes where. Here's an overview of the more important options:
login.enabled
Allow users to call login. Defaults to true. Needs to be explicitly set to false to disable the flow.
login: {
  enabled: false
}
login.handler()
If you want to do something other than immediately let a user log in if their username/password is correct, you can add additional logic in login.handler(). For example, if a user's credentials are correct, but they haven't verified their email address yet, you can throw an error in this function with the appropriate message and then display it to the user. If the login should proceed, simply return the user that was passed as the only argument to the function:
login: {
  handler: (user) => {
    if (!user.verified) {
      throw new Error('Please validate your email first!')
    } else {
      return user
    }
  }
}
signup.enabled
Allow users to sign up. Defaults to true. Needs to be explicitly set to false to disable the flow.
signup: {
  enabled: false
}
signup.handler()
This function should contain the code needed to actually create a user in your database. You will receive a single argument which is an object with all of the fields necessary to create the user (username, hashedPassword and salt) as well as any additional fields you included in your signup form in an object called userAttributes:
signup: {
  handler: ({ username, hashedPassword, salt, userAttributes }) => {
    return db.user.create({
      data: {
        email: username,
        hashedPassword: hashedPassword,
        salt: salt,
        name: userAttributes.name,
      },
    })
  }
}
Before signup.handler() is invoked, dbAuth will check that the username is unique in the database and throw an error if not.
There are three things you can do within this function depending on how you want the signup to proceed:
- If everything is good and the user should be logged in after signup: return the user you just created
- If the user is safe to create, but you do not want to log them in automatically: return a string, which will be returned by the
signUp()function you called after destructuring it fromuseAuth()(see code snippet below) - If the user should not be able to sign up for whatever reason: throw an error in this function with the message to be displayed
You can deal with case #2 by doing something like the following in a signup component/page:
const { signUp } = useAuth()

const onSubmit = async (data) => {
  const response = await signUp({ ...data })

  if (response.message) {
    toast.error(response.message) // user created, but not logged in
  } else {
    toast.success('Welcome!') // user created and logged in
    navigate(routes.dashboard())
  }
}
forgotPassword.enabled
Allow users to request a new password via a call to forgotPassword. Defaults to true. Needs to be explicitly set to false to disable the flow.
When disabling this flow you probably want to disable resetPassword as well.
forgotPassword: {
  enabled: false
}
forgotPassword.handler()
This handler is invoked if a user is found with the username/email that they submitted on the Forgot Password page, and that user will be passed as an argument. Inside this function is where you'll send the user a link to reset their password—via an email is most common. The link will, by default, look like:
https://example.com/reset-password?resetToken=${user.resetToken}
If you changed the path to the Reset Password page in your routes you'll need to change it here. If you used another name for the resetToken database field, you'll need to change that here as well:
https://example.com/reset-password?resetKey=${user.resetKey}
resetPassword.enabled
Allow users to reset their password via a code from a call to forgotPassword. Defaults to true. Needs to be explicitly set to false to disable the flow.
When disabling this flow you probably want to disable forgotPassword as well.
resetPassword: {
  enabled: false
}
resetPassword.handler()
This handler is invoked after the password has been successfully changed in the database. Returning something truthy (like return user) will automatically log the user in after their password is changed. If you'd like to return them to the login page and make them log in manually, return false and redirect the user in the Reset Password page.
Cookie config
These options determine how the cookie that tracks whether the client is authorized is stored in the browser. The default configuration should work for most use cases. If you serve your web and api sides from different domains you'll need to make some changes: set SameSite to None and then add CORS configuration.
cookie: {
  HttpOnly: true,
  Path: '/',
  SameSite: 'Strict',
  Secure: true,
  // Domain: 'example.com',
}
CORS config
If you're using dbAuth and your api and web sides are deployed to different domains then you'll need to configure CORS for both GraphQL in general and dbAuth. You'll also need to enable a couple of options to be sure and send/accept credentials in XHR requests. For more info, see the complete CORS doc.
Error Messages
There are several error messages that can be displayed, including:
- Username/email not found
- Incorrect password
- Expired reset password token
We've got some default error messages that sound nice, but may not fit the tone of your site. You can customize these error messages in api/src/functions/auth.js in the errors prop of each of the login, signup, forgotPassword and resetPassword config objects. The generated file contains tons of comments explaining when each particular error message may be shown.
WebAuthn Config
See WebAuthn Configuration section below.
Environment Variables
Cookie Domain
By default, the session cookie will not have the Domain property set, which a browser will default to be the current domain only. If your site is spread across multiple domains (for example, your site is at example.com but your api-side is deployed to api.example.com) you'll need to explicitly set a Domain so that the cookie is accessible to both.
To do this, set the cookie.Domain property in your api/src/functions/auth.js configuration, set to the root domain of your site, which will allow it to be read by all subdomains as well. For example:
cookie: {
  HttpOnly: true,
  Path: '/',
  SameSite: 'Strict',
  Secure: process.env.NODE_ENV !== 'development' ? true : false,
  Domain: 'example.com'
}
Session Secret Key
If you need to change the secret key that's used to encrypt the session cookie, or deploy to a new target (each deploy environment should have its own unique secret key) we've got a CLI tool for creating a new one:
yarn rw g secret
Note that the secret that's output is not appended to your .env file or anything else, it's merely output to the screen. You'll need to put it in the right place after that.
The .env file is set to be ignored by git and not committed to version control. There is another file, .env.defaults, which is meant to be safe to commit and contain simple ENV vars that your dev team can share. The encryption key for the session cookie is NOT one of these shareable vars!
WebAuthn
WebAuthn is a specification written by the W3C and FIDO with participation from Google, Mozilla, Microsoft, and others. It defines a standard way to use public key cryptography instead of a password to authenticate users.
That's a very technical way of saying: users can log in with TouchID, FaceID, Windows Hello, Yubikey, and more.
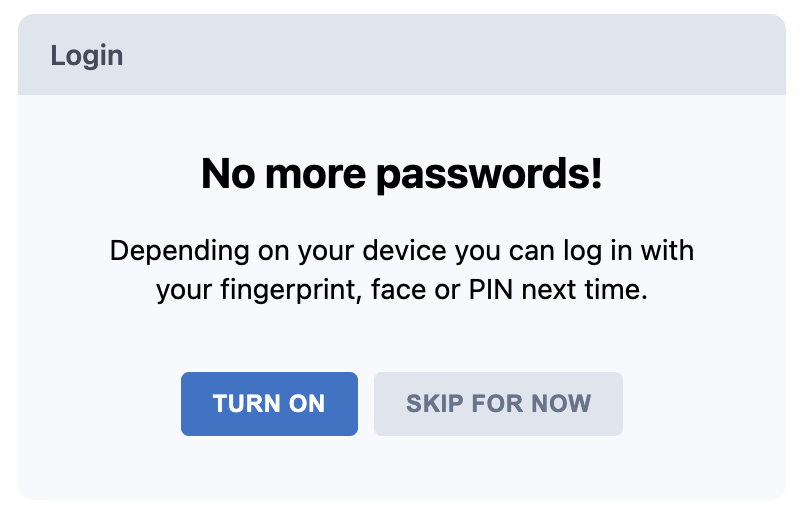
We'll refer to whatever biometric device that's used as simply a "device" below. The WebAuthn flow includes two "phases":
- Registration: the first time a new device is added for a user (a user can have multiple devices registered)
- Authentication: the device is recognized and can be used to login on subsequent visits
User Experience
The LoginPage generated by Redwood includes two new prompts on the login page, depending on the state of the user and whether they have registered their device yet or not:
Registration
The user is prompt to login with username/password:
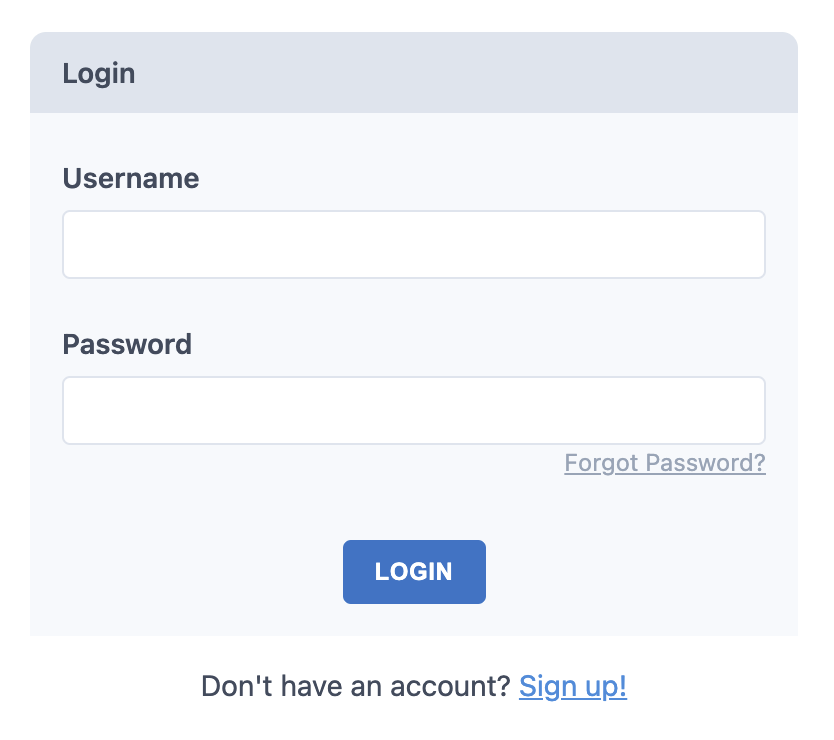
Then asked if they want to enable WebAuthn:
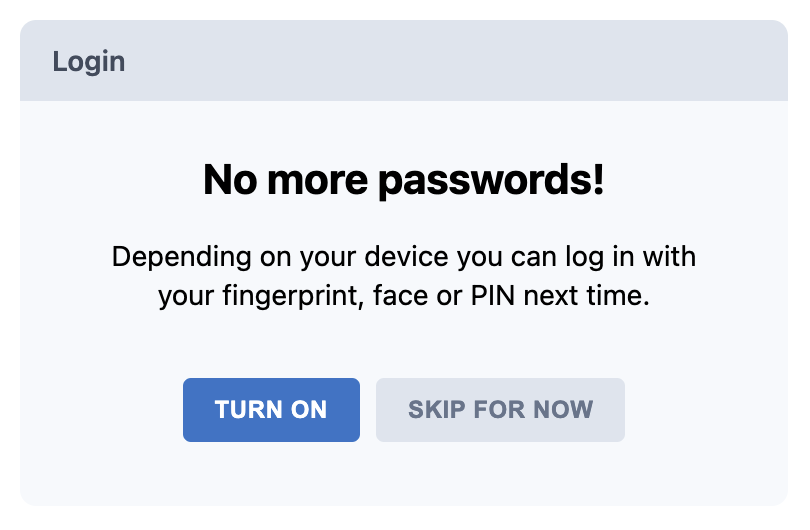
If so, they are shown the browser's prompt to scan:
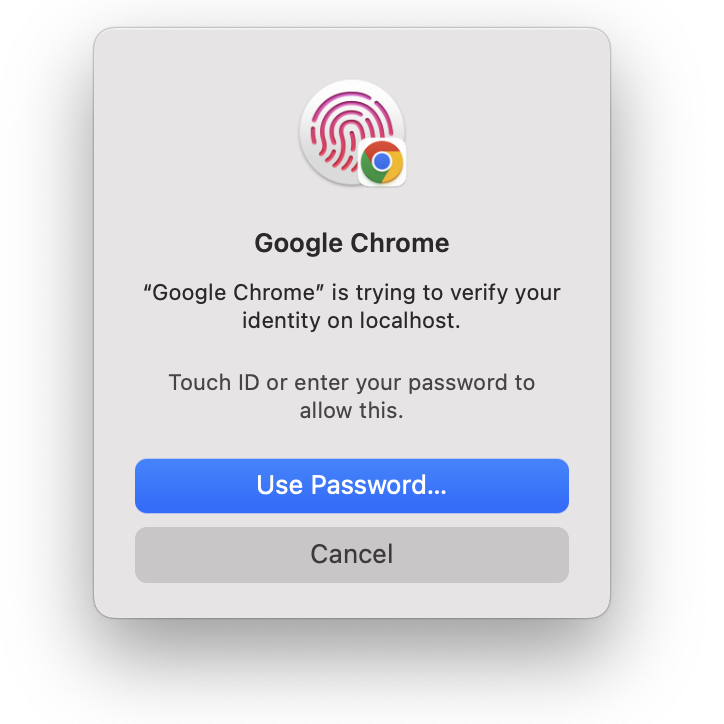
If they skip, they just proceed into the site as usual. If they log out and back in, they will be prompted to enable WebAuthn again.
Authentication
When a device is already registered then it can be used to skip username/password login. The user is immediately shown the prompt to scan when they land on the login page (if the prompt doesn't show, or they mistakenly cancel it, they can click "Open Authenticator" to show the prompt again)
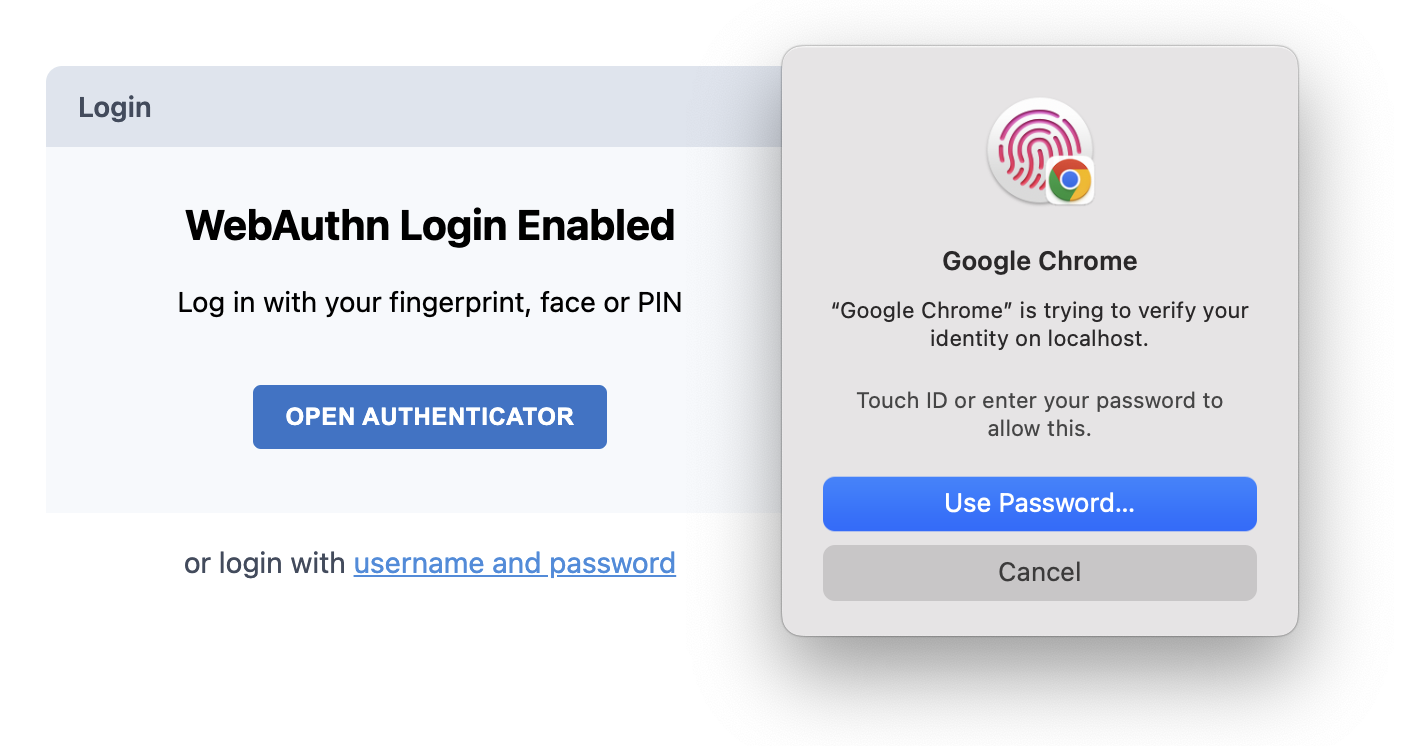
They can also choose to go to use username/password credentials instead of their registered device.
How it Works
The back and forth between the web and api sides works like this:
Registration
- If the user selects to enable their device, a request is made to the server for "registration options" which is a JSON object containing details about the server and user (domain, username).
- Your app receives that data and then makes a browser API call that says to start the biometric reader with the received options
- The user scans their fingerprint/face and the browser API returns an ID representing this device, a public key and a few other fields for validation on the server
- The ID, public key, and additional details are sent to the server to be verified. Assuming the are, the device is saved to the database in a
UserCredentialtable (you can change the name if you want). The server responds by placing a cookie on the user's browser with the device ID (a random string of letters and numbers)
A similar process takes place when authenticating:
Authentication
- If the cookie from the previous process is present, the web side knows that the user has a registered device so a request is made to the server to get "authentication options"
- The server looks up user who's credential ID is in the cookie and gets a list of all of the devices they have registered in the past. This is included along with the domain and username
- The web side receives the options from the server and a browser API call is made. The browser first checks to see if the list of devices from the server includes the current device. If so, it prompts the user to scan their fingerprint/face (if the device is not in the list, the user will directed back to username/password signup)
- The ID, public key, user details and a signature are sent to the server and checked to make sure the signature contains the expected data encrypted with the public key. If so, the regular login cookie is set (the same as if the user had used username/password login)
In both cases, actual scanning and matching of devices is handled by the operating system: all we care about is that we are given a credential ID and a public key back from the device.
Browser Support
WebAuthn is supported in the following browsers (as of July 2022):
| OS | Browser | Authenticator |
|---|---|---|
| macOS | Firefox | Yubikey Security Key NFC (USB), Yubikey 5Ci, SoloKey |
| macOS | Chrome | Touch ID, Yubikey Security Key NFC (USB), Yubikey 5Ci, SoloKey |
| iOS | All | Face ID, Touch ID, Yubikey Security Key NFC (NFC), Yubikey 5Ci |
| Android | Chrome | Fingerprint Scanner, caBLE |
| Android | Firefox | Screen PIN |
Configuration
WebAuthn support requires a few updates to your codebase:
- Adding a
UserCredentialmodel - Adding configuration options in
api/src/functions/auth.js - Adding a
clientto the<AuthProvider>inApp.js - Adding an interface during the login process that prompts the user to enable their device
If you setup dbAuth and generated the LoginPage with WebAuthn support then all of these steps have already been done for you! As described in the post-setup instructions you just need to add the required fields to your User model, create a UserCredential model, and you're ready to go!
If you didn't setup WebAuthn at first, but decided you now want WebAuthn, you could run the setup and generator commands again with the --force flag to overwrite your existing files. Any changes you made will be overwritten, but if you do a quick diff in git you should be able to port over most of your changes.
Schema Updates
You'll need to add two fields to your User model, and a new UserCredential model to store the devices that are used and associate them with a user:
datasource db {
  provider = "sqlite"
  url      = env("DATABASE_URL")
}

generator client {
  provider      = "prisma-client-js"
  binaryTargets = "native"
}

model User {
  id                  Int @id @default(autoincrement())
  email               String  @unique
  hashedPassword      String
  salt                String
  resetToken          String?
  resetTokenExpiresAt DateTime?
  webAuthnChallenge   String? @unique
  credentials         UserCredential[]
}

model UserCredential {
  id         String @id
  userId     Int
  user       User   @relation(fields: [userId], references: [id])
  publicKey  Bytes
  transports String?
  counter    BigInt
}
Run yarn rw prisma migrate dev to apply the changes to your database.
Function Config
Next we need to let dbAuth know about the new field and model names, as well as how you want WebAuthn to behave (see the highlighted section)
import { db } from 'src/lib/db'
import { DbAuthHandler } from '@redwoodjs/api'

export const handler = async (event, context) => {

  // assorted handler config here...

  const authHandler = new DbAuthHandler(event, context, {
    db: db,
    authModelAccessor: 'user',
    credentialModelAccessor: 'userCredential',
    authFields: {
      id: 'id',
      username: 'email',
      hashedPassword: 'hashedPassword',
      salt: 'salt',
      resetToken: 'resetToken',
      resetTokenExpiresAt: 'resetTokenExpiresAt',
      challenge: 'webAuthnChallenge',
    },

    cookie: {
      HttpOnly: true,
      Path: '/',
      SameSite: 'Strict',
      Secure: process.env.NODE_ENV !== 'development' ? true : false,
    },

    forgotPassword: forgotPasswordOptions,
    login: loginOptions,
    resetPassword: resetPasswordOptions,
    signup: signupOptions,

    webAuthn: {
      enabled: true,
      expires: 60 * 60 * 14,
      name: 'Webauthn Test',
      domain:
        process.env.NODE_ENV === 'development' ? 'localhost' : 'server.com',
      origin:
        process.env.NODE_ENV === 'development'
          ? 'http://localhost:8910'
          : 'https://server.com',
      type: 'platform',
      timeout: 60000,
      credentialFields: {
        id: 'id',
        userId: 'userId',
        publicKey: 'publicKey',
        transports: 'transports',
        counter: 'counter',
      },
    },
  })

  return await authHandler.invoke()
}
credentialModelAccessorspecifies the name of the accessor that you call to access the model you created to store credentials. If your model name isUserCredentialthen this field would beuserCredentialas that's how Prisma's naming conventions work.authFields.challengespecifies the name of the field in the user model that will hold the WebAuthn challenge string. This string is generated automatically whenever a WebAuthn registration or authentication request starts and is one more verification that the browser request came from this user. A user can only have one WebAuthn request/response cycle going at a time, meaning that they can't open a desktop browser, get the TouchID prompt, then switch to iOS Safari to use FaceID, then return to the desktop to scan their fingerprint. The most recent WebAuthn request will clobber any previous one that's in progress.webAuthn.enabledis a boolean, denoting whether the server should respond to webAuthn requests. If you decide to stop using WebAuthn, you'll want to turn it off here as well as update the LoginPage to stop prompting.webAuthn.expiresis the number of seconds that a user will be allowed to keep using their fingerprint/face scan to re-authenticate into your site. Once this value expires, the user must use their username/password to authenticate the next time, and then WebAuthn will be re-enabled (again, for this length of time). For security, you may want to log users out of your app after an hour of inactivity, but allow them to easily use their fingerprint/face to re-authenticate for the next two weeks (this is similar to login on macOS where your TouchID session expires after a couple of days of inactivity). In this example you would setlogin.expiresto60 * 60andwebAuthn.expiresto60 * 60 * 24 * 14.webAuthn.nameis the name of the app that will show in some browser's prompts to use the devicewebAuthn.domainis the name of domain making the request. This is just the domain part of the URL, ex:app.server.com, or in development modelocalhostwebAuthn.originis the domain including the protocol and port that the request is coming from, ex: https://app.server.com In development mode, this would behttp://localhost:8910webAuthn.type: the type of device that's allowed to be used (see next section below)webAuthn.timeout: how long to wait for a device to be used in milliseconds (defaults to 60 seconds)webAuthn.credentialFields: lists the expected field names that dbAuth uses internally mapped to what they're actually called in your model. This includes 5 fields total:id,userId,publicKey,transports,counter.
WebAuthn type Option
The config option webAuthn.type can be set to any, platform or cross-platform:
platformmeans to only allow embedded devices (TouchID, FaceID, Windows Hello) to be usedcross-platformmeans to only allow third party devices (like a Yubikey USB fingerprint reader)anymeans to allow both platform and cross-platform devices
In some browsers this can lead to a pretty drastic UX difference. For example, here is the interface in Chrome on macOS with the included TouchID sensor on a Macbook Pro:
any
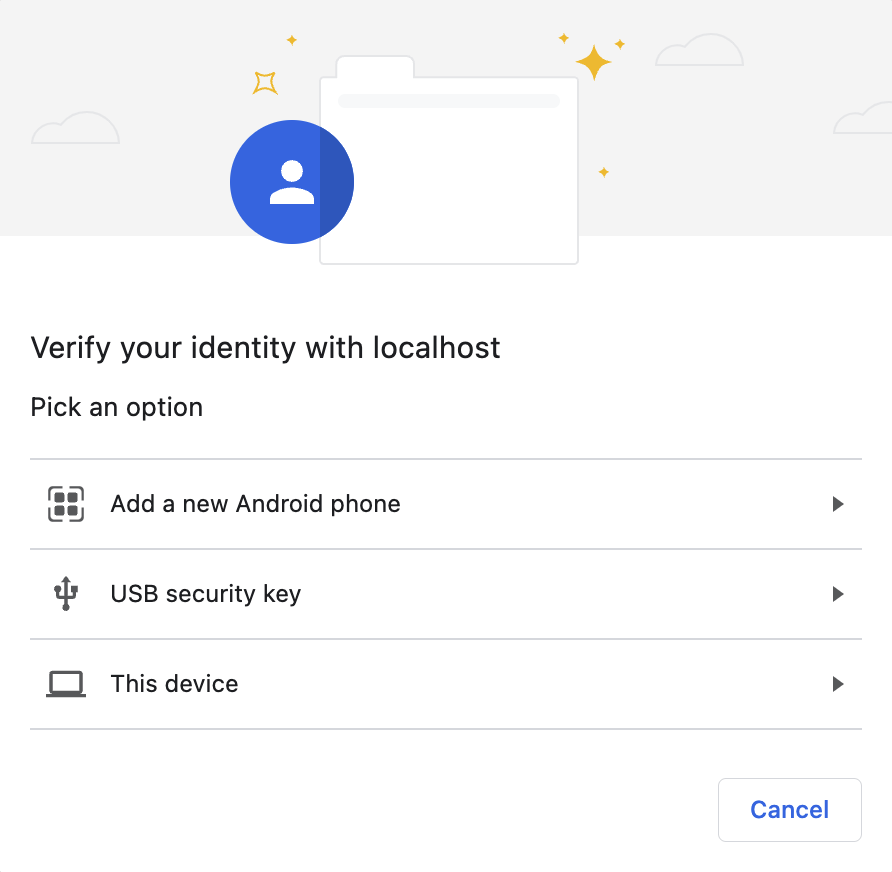
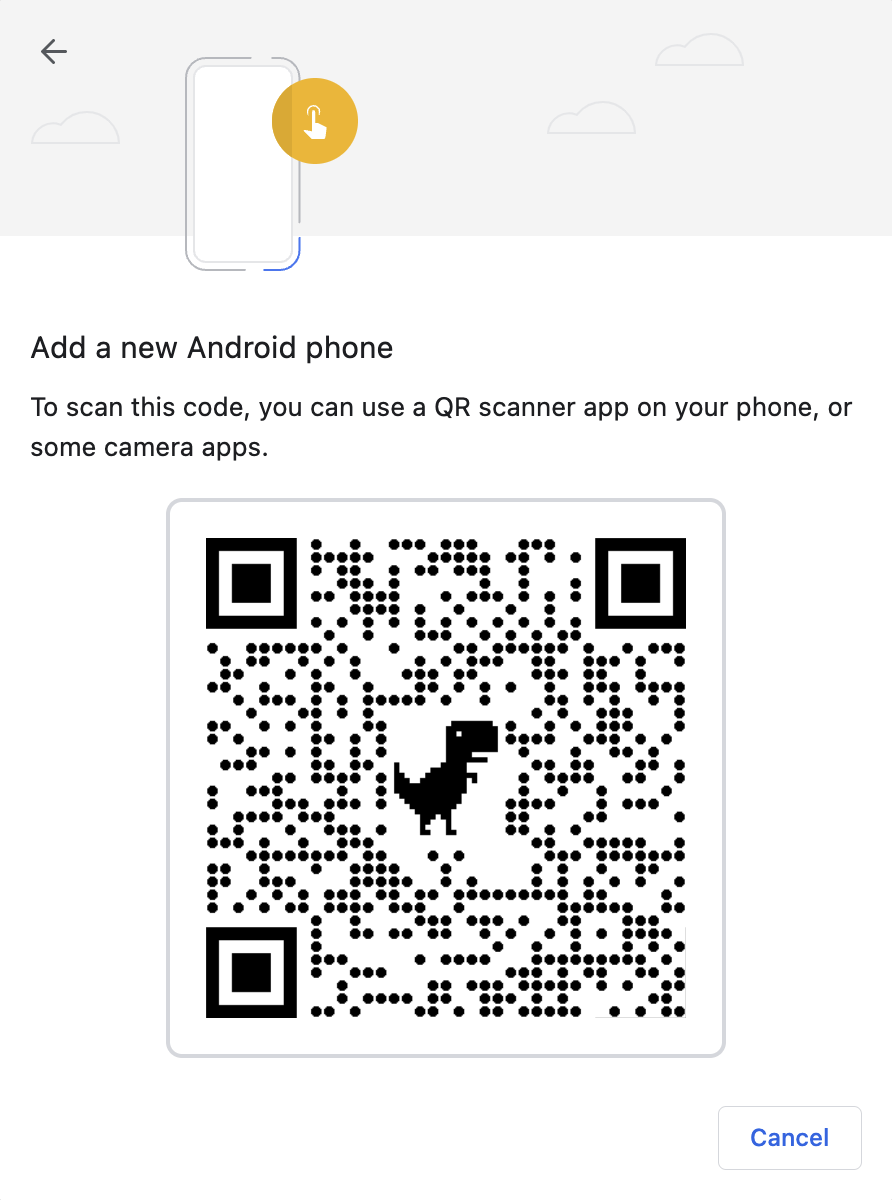
If you pick "Add a new Android Phone" you're presented with a QR code:
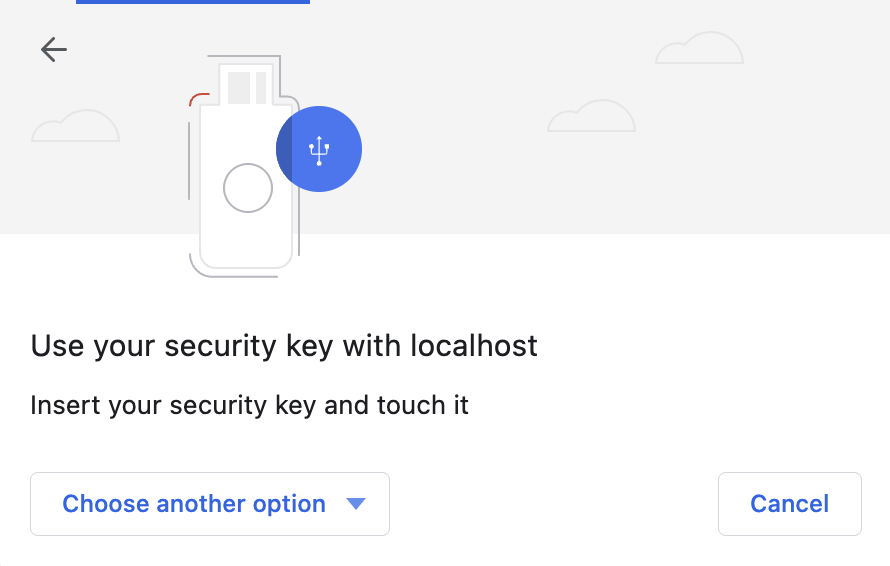
If you pick "USB Security Key" you're given the chance to scan your fingerprint in a 3rd party USB device:
And finally if you pick "This device" you're presented with the standard interface you'd get if used platform as your type:
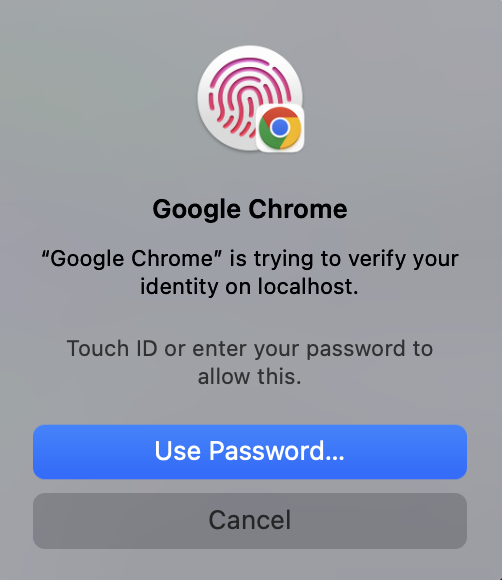
You'll have to decide if this UX tradeoff is worth it for your customers, as it can be pretty confusing when first presented with all of these options when someone is just used to using TouchID or FaceID.
platform
The platform option provides the simplest UI and one that users with a TouchID or FaceID will be immediately familiar with:

Note that you can also fallback to use your user account password (on the computer itself) in addition to TouchID:
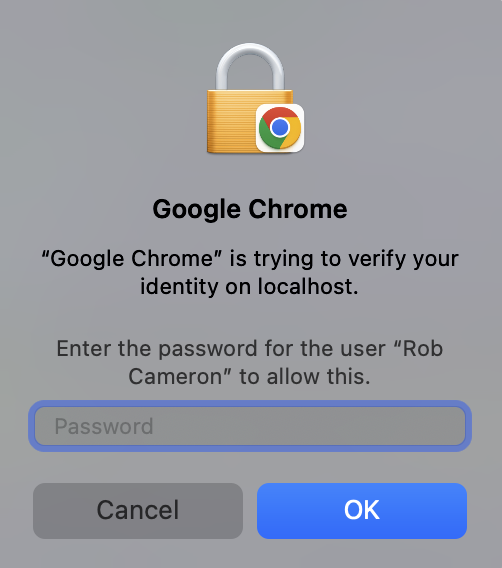
Both the password and TouchID scan will count as the same device, so users can alternate between them if they want.
cross-platform
This interface is the same as any, but without the option to pick "This device":
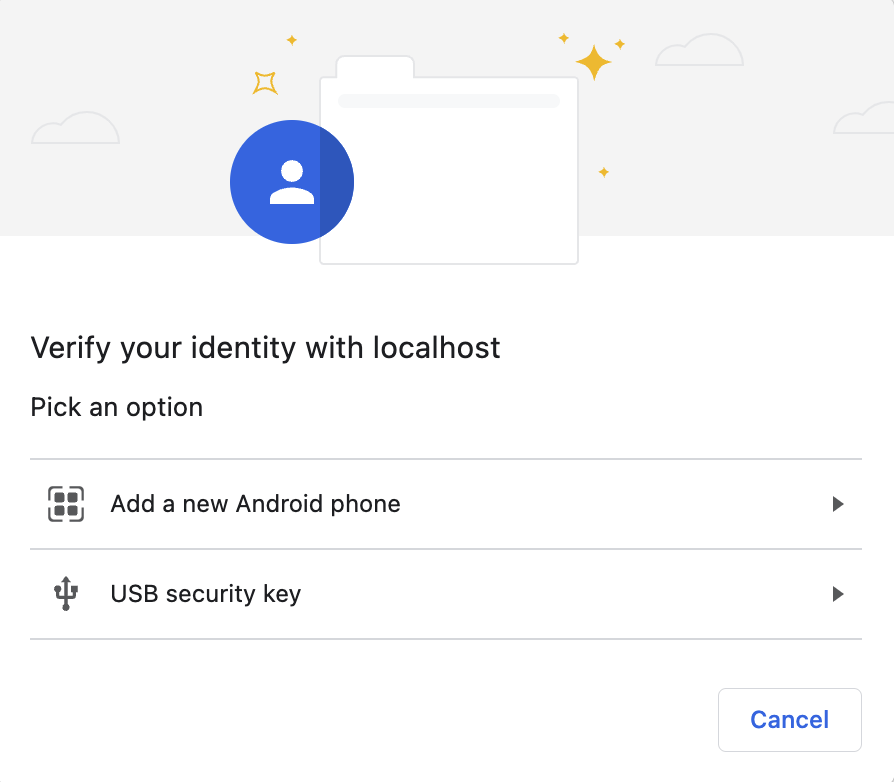
So while the any option is the most flexible, it's also the most confusing to users. If you do plan on allowing any device, you may want to do a user-agent check and try to explain to users what the different options actually mean.
The api-side is now ready to go.
App.js Updates
If you generated your login/signup pages with yarn rw g dbAuth --webAuthn then all of these changes are in place and you can start using WebAuthn right away! Otherwise, read on.
First you'll need to import the WebAuthnClient and give it to the <AuthProvider> component:
import { AuthProvider } from '@redwoodjs/auth'
import WebAuthnClient from '@redwoodjs/auth/webAuthn'
import { FatalErrorBoundary, RedwoodProvider } from '@redwoodjs/web'
import { RedwoodApolloProvider } from '@redwoodjs/web/apollo'

import FatalErrorPage from 'src/pages/FatalErrorPage'
import Routes from 'src/Routes'

import './scaffold.css'
import './index.css'

const App = () => (
  <FatalErrorBoundary page={FatalErrorPage}>
    <RedwoodProvider titleTemplate="%PageTitle | %AppTitle">
      <AuthProvider type="dbAuth" client={WebAuthnClient}>
        <RedwoodApolloProvider>
          <Routes />
        </RedwoodApolloProvider>
      </AuthProvider>
    </RedwoodProvider>
  </FatalErrorBoundary>
)

export default App
Now you're ready to access the functionality added by the WebAuthn client. The easiest way to do this would be to generate a new LoginPage with yarn rw g dbAuth --webAuthn, even if it's in a brand new, throwaway app, and copy the pieces you need (or just replace your existing login page with it).
The gist of building a login flow is that you now need to stop after username/password authentication and, if the browser supports WebAuthn, give the user the chance to register their device. If they come to the login page and already have the webAuthn cookie then you can show the prompt to authenticate, skipping the username/password form completely. This is all handled in the LoginPage template that Redwood generates for you.
WebAuthn Client API
The client that we gave to the AuthProvider can be destructured from useAuth():
const { isAuthenticated, client, logIn } = useAuth()
client gives you access to four functions for working with WebAuthn:
client.isSupported(): returns a Promise which resolves to a boolean—whether or not WebAuthn is supported in the current browser browserclient.isEnabled(): returns a boolean for whether the user currently has awebAuthncookie, which means this device has been registered already and can be used for loginclient.register(): returns a Promise which gets options from the server, presents the prompt to scan your fingerprint/face, and then sends the result up to the server. It will either resolve successfully with an object{ verified: true }or throw an error. This function is used when the user has not registered this device yet (client.isEnabled()returnsfalse).client.authenticate(): returns a Promise which gets options from the server, presents the prompt to scan the user's fingerprint/face, and then sends the result up to the server. It will either resolve successfully with an object{ verified: true }or throw an error. This should be used when the user has already registered this device (client.isEnabled()returnstrue)